GlideFit: Safety and Setup Basics
CHAPTER 1
Lesson 1: Glide and CardioWave
About Glide SUP Glide has a humble & unique history with the water. Lead shaper, designer, and managing partner Ken Driscoll entered the world of stand up paddle boarding after breaking his back and ending his career as a professional kayaker. Still wanting to explore the water in a recreational way with a lower impact activity, Ken explored new shapes in stand up paddle board design. Glide grew from a garage project, to a small warehouse, to what it is today – the largest manufacturer and distributor of paddle boards in the Americas. Glide is committed to ethical and eco – friendly production, and is unique among SUP companies for adhering to our three core values: promote Made in the USA, maintain ultra-durable performance, and cultivate environmental consciousness. Glide has been an innovator in the fields of SUP Yoga & Fitness, partnering with pioneers in the sport to desgn a yoga specific board in 2012, when SUPYoga was just starting to gain momentum in the SUP industry. Over the years, our commitment to creating an ultra stable, ultra durable, beautiful and comfortable stand up paddle board for yoga has brought notice from the SUP world. In 2014, we launched the first SUP Yoga ambassador program, which sought yogis from around the country and in turn grew internationally in 2015. As we worked towards developing the best education program possible for SUP Yoga, we found many parallels between SUP Yoga and SUP Fitness. Here began the evolution in innovating and designing one of the first products designed specifically for balance training and core stabilization on water – the GlideFit.  What is the GlideFit Since 2010, stand up paddle boarding has exploded globally as a fitness and recreation trend. It’s accessibility across bodies of water, ages and fitness levels, has made it one of the most popular sport on record ever. With the rapidly growing SUP industry came a desire to practice floating fitness everywhere – not just in open water. More recently, stand up paddle board yoga and fitness classes have made their way from open bodies of water like lakes and bays, to indoor facilities like gyms, recreation centers, and resorts. Enthusiasts are finding ways to keep the SUP fitness going year round despite sometimes harsh winter climates. Realizing this, we created the Glide Fit, the perfect solution for aquatic based stability training (ABST). Designed for indoor and outdoor pools, this unique, stationary, floating fitness mat enables gyms, resorts, recreation centers, and hospitals to get all the benefits of core stabilization and the challenge of instability with a smaller, more portable board option. The Fit is designed for our ABST CardioWave classes, and built with the same high quality standards you’ve come to expect.
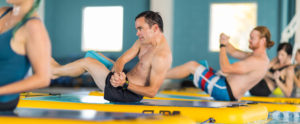
  What is CardioWave CardioWave was developed to give class participants the most beneficial 1 hour workout in the floating fitness world, combining the immense benefits of aquatic based stability training (ABST), building functional strength while utilizing high intensity interval training (HIIT). CardioWave burns more calories and effectively improves strength, balance, and flexibility more rapidly than land-based workouts. The CardioWave Warmup During the warmup, you will begin to build your CardioWave by increasing your heartrate as the instructor guides you through unique and exciting warm-up. This buildup will prepare you mentally and physically to exert maximum effort for the rest of your workout as you become comfortable on the GlideFit mat. Peak Effort At the peak of your CardioWave workout, you will reap all of the amazing benefits of HITT, with the functional training of an ABST work-out. Combined, the CardioWave program melts fat, increases metabolism and builds muscle through a comprehensive aquatic balanced based workout. If weight loss is your goal, you can expect to lose 3-5 pounds per week by attending a class at least 3 times weekly and maintaining a healthy diet. If you are looking to maximize your athletic performance, you can expect to see an increase in balance, speed, strength and aerobic fitness within two weeks. Cooldown In line with scientific findings, the CardioWave cool down provides time to calm and center your mind and body as your instructor guides you through breathing, yoga, and static stretching to maximize flexibility. CardioWave class participants leave feeling focused, and refreshed. Floating Fitness Why GlideFit? Aside from the fact that floating fitness is super fun, it’s also a great workout and an awesome way to train balance, while building core stability. “Core” is a term fitness and wellness enthusiasts often use, but is seldom defined specifically or what it means to have a strong core in terms of overall health. Core stability refers to the strength of the muscles surrounding and protecting the spine. Those lacking in this area of strength are more likely to suffer from back injuries, as well as other issues related to proper alignment. The likelihood of other peripheral injuries increases in those with a weak core as the core muscles help to transmit force from the lower limbs to the upper limbs and vice versa.
CHAPTER 2
Lesson 2: Aquatic Based Stability Training (ABST)
Benefits of ABST
- Body Awareness. Body awareness is the sense of how your own limbs are oriented in space, also referred to as proprioception. Balance training promotes body awareness, which makes movement more seamless, with less likelihood of injury.
- Coordination. Balance training requires all of your body to work together otherwise you might fall or stumble. By improving your coordination during balancing training, there should be an improvement to your coordination in everyday life.
- Joint Stability. Balance training promotes stable knees, ankles, hips, and shoulders. This can prevent a whole array of injuries including sprained ankles and serious knee problems. These injuries can be common in people who train and participate in sports, but do not include balance training in their workout regiment.
- Reaction Time. If you slip or stumble when carrying out challenging balance exercises your body needs to re-balance immediately or you will fall. This can improve your reaction time as you learn to quickly realign your body while creating new and correct muscle memory.
- Strength. Balance training is challenging for your nervous system (brain and nerves). The nervous system recruits your muscles when lifting weights, so as your nervous system becomes more efficient it can recruit a higher percentage of your muscle for each lift. This means you are stronger and can lift more weight.
- Power. Power is the ability to exert maximum muscular contraction instantly in an explosive burst of movement. The two components of power are strength and speed. With quicker reaction times and stronger muscles, your power ability will naturally increase.
- Agility. Agility is the ability to change the direction of the body in an efficient and effective manner and to achieve this you require a combination of balance, speed, strength, and coordination. Therefore, the better your balance is, the more likely you are to have good agility.
- Fun & Challenging. Adding some balance exercises into your fitness routine adds another dimension to your workout. Taking tried and true exercises and learning to negotiate your balance engages the body/mind connection in a fun new way. It is motivating when you notice the improvement to the rest of your fitness regiment by adding in balance training.
- Long term health. Incorporating balance training into your routine helps to maintain or improve your balance, which is needed to prevent falls and fractures. As the body ages without balance training, commonplace activities can become more challenging, something we want to avoid.
 Body Awareness Body Awareness or the medical term Proprioception. Proprioception, simply put, means sense of self or body awareness. The proprioceptors are sensors that provide information about joint angle, muscle length and muscle tension, which gives the brain information about the position of the limb in space at any given time. How is it that a professional basketball player can launch in the air, catch the ball, and then do a reverse dunk seemingly effortless? Proprioception. We also use Proprioception everyday with out thinking twice about it. It’s how we walk down a flight of stairs at night when the lights are off, or insert your car key in the ignition without looking. Most of us are able to execute body movements that require proprioception without much worry. CardioWave will help develop high-level proprioceptive abilities that will not only improve your athletic performance, but simply make you more coordinated and agile no matter what you do. Coordination Whatever your athletic interest, your coordination training plays a key role in your overall fitness. CardioWave will work on your balance and coordination, while enhancing your performance and reducing your risk of injury. Basically, you can do more complex movements faster, with less risk. If you are coordinated, you can make your muscles work together at just the right time to produce the exact amount of force you need to accomplish a skill with the least amount of effort. Increasing your coordination will increase your bodies ability to work in a more efficient way. The increase in efficiency will allow you to prolong exertion with less effort. As we age, our risk of falling rises—as does the chance that those falls will prove debilitating. You want to be able to catch yourself before you fall, but you also want to be able to manage your fear of falling, which can in itself begin to restrict your range of motion. You need to be able to move confidently through the world, rather than tentatively—and for that you need to be able to trust in your own powers of balance and coordination. Joint Stability There are many benefits to either creating or maintaining stability in your joints. They include a better range of motion (ROM), decreased chance of injury, greater maximal force, and stronger muscles. Each type of joint in our body allows for different degrees of movement. Maintaining strength through those movements is important in giving us the ability to move better. Joint Stability is referred to as the resistance of musculoskeletal tissues around a joint. What this means is that the stronger the muscles are around a given joint the more stable that joint will be. This is very important to remember no matter what level of training you are at. In the majority of lifts and exercises done in the gym and out on the sports field, the muscles that are used are known as “prime movers”. Prime movers push and pull us around in almost every movement. When prime movers gain strength, they put more force into those movements. In order for the prime movers to have a stable base to push and pull from, the stabilizer and fixator muscles need to be strong. Reaction Time The space between a stimulus and the beginning of the muscle response to that stimulus is known as reaction time. Reaction time, along with agility, coordination, balance, speed and power, are key components of skill-related fitness. Good reaction time translates to success in sports and in life activities that require strong motor skills. It’s also one of the critical factors for safeguarding health and independence as you age. CardioWave engages fast twitch and slow twitch muscles. Fast twitch muscle fibers are the ones that control reaction time and agility. They excel in the explosive, brief anaerobic moves of the participant, and it takes a powerful force to enlist them. Aerobic activity utilizes slow twitch muscles first so, in order to get to the fast twitch response, you have to instill the habit with repetitive anaerobic exercise. CardioWave is designed to incorporate fast and slow twitch muscle fibers. Faster reaction time gives you a significant competitive edge in sports and helps to protect you from injury in daily life.
  Strength Not only does strength training aid in shedding pounds, it helps maintain weight loss, too. A recent study revealed that women who followed a weight-training routine 3 times a week increased the amount of calories burned in normal daily activity (in addition to those burned during exercise), helping them to maintain their current weight. Strength training protects bone health and muscle mass. After puberty, whether you are a man or a woman, you begin to lose about 1 percent of your bone and muscle strength every year. One of the best ways to stop, prevent, and even reverse bone and muscle loss is to add strength training to your workouts. Strength training has benefits that go well beyond the appearance of nicely toned muscles. Your balance and coordination will improve, as will your posture. More importantly, if you have poor flexibility and balance, strength training can reduce your risk of falling by as much as 40 percent, a crucial benefit, especially as you get older. Strength training will elevate your level of endorphins (natural opiates produced by the brain), which will make you feel great. As if that isn’t enough to convince you, strength training has also been shown to be a great antidepressant, to help you sleep better, and to improve your overall quality of life. You burn calories during the CardioWave strength training, and your body continues to burn calories after strength training. More calories are used to make and maintain muscle than fat, and in fact strength training can boost your metabolism by 15 percent — that can really jumpstart a weight loss plan. Here is a short list of benefits that our strength training portion of CardioWave can help with:
- Increases HDL – High Density Lipoprotein (good cholesterol) and decrease LDL – Low Density Lipoprotein (bad cholesterol).
- Reduces risk of diabetes and insulin needs.
- Lowers risk of cardiovascular disease.
- Lower high blood pressure.
- Lowers risk of breast cancer – reduces high estrogen levels linked to the disease.
- Decreases or minimizes risk of osteoporosis by building bone mass.
- Reduces symptoms of PMS (Premenstrual Syndrome)
- Reduces stress and anxiety.
- Decreases colds and illness.
Power Power training, is proving to be just as important as strength training in maintaining or restoring function. Power training is aimed at increasing power, which is the product of both strength and speed. Optimal power reflects how quickly you can exert force to produce the desired movement. Here’s an example: Faced with a four-lane intersection, you may have enough strength to walk across the street. But it’s power, not just strength, that can get you across all four lanes of traffic before the light changes. Likewise, power can prevent falls by helping you react swiftly if you start to trip or lose your balance. CardioWave has specific exercises that are aimed at increasing power. 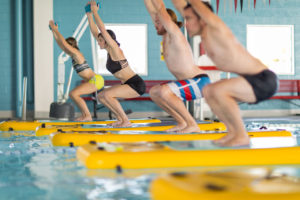 Agility Agility is your body’s ability to be quick, graceful, and nimble. It is how effectively and efficiently you can move, change direction and the position of your body while maintaining control.
Many injuries happen when the body falls out of alignment in motion—think of pulling the muscles in your lower back if you lift from an improper position, or tearing the ligaments in a knee if you misstep. CardioWave classes increase balance, control and flexibility, allowing the body to maintain proper posture and alignment during movement. Agility training helps the body learn correct body placement, meaning sensitive areas like the shoulders, lower back and knees are protected while moving quickly. Sometimes an intense workout can leave you with sore muscles and decreased energy levels the next day. But the bursts of movement in agility training, when practiced over a sustained period of time, help build strength in the musculoskeletal system, which in turn can shorten recovery time.
CHAPTER 3
Lesson 3: Equipment and Materials
FIT CONSTRUCTION- Drop stitch construction is a technology developed for military applications that allowed inflatable craft to become much stronger, more durable and lighter. It also allows designers to make the shapes of inflatables more hydrodynamic. Originally created to make inflatable aircraft wings, the rafting industry adopted drop stitch and it proved to be excellent for inflatable water craft. Thousands of polyester threads allow craft to be made with two flat surfaces that are in tension with each other- without the threads, inflatables would bulge out like balloons and be much less rigid. The threads are sewn between two pieces of support fabric woven from polyester. Up to 400 needles are used, each sewing evenly spaced threads back and forth between the two pieces of fabric. This process essentially binds the two pieces together so that when inflated they are held in tension at the length of the threads- 6” threads make a 6” thick Fit. Inflatables without drop stitching can fold like tacos when inflated to max pressure. Drop stitch allows us to build the Fit to be perfectly flat and rock hard when inflated. 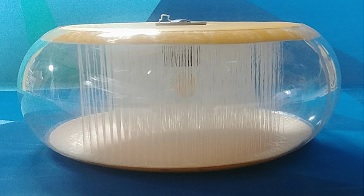 The next step of Fit construction is Fusion. In the past, the outer layer of the inflatable (PVC, Neoprene, Hypalon) would be hand-glued to the drop stitch cloth, then in turn the seams would be glued together as well. This process was vulnerable to errors during the gluing, which would then lead to failure of the inflatable. Fusion is the mechanical process of layering hot liquid PVC onto the drop stitch which creates a fused single material and eliminates hand gluing. The seams of the FIT are then joined by plastic welding which also eliminates gluing. The Fusion process results in up to 20% less weight in the final product and a 50% gain in structural rigidity. FIT FEATURES-
- Extra large brush finished pad for comfort and grip
- 15 psi and 6” drop stitch core for ultra stability
- Designed to fit between standard swimming pool lanes
- Extremely lightweight and easy to store
FIT DIMENSIONS- 7’8”L X 35.5.”W X 6”T FIT ANATOMY-  CARE & KEEPING- Although the Fit is strong enough to be inflated to 25 PSI, we find that 15 PSI is adequate for most students. After use, rinse the floats with fresh water to prevent bleaching of the deck pads. When not in use, the boards can be stacked to store or deflated, rolled up, and put away. Always dry the Fits completely before storing them to avoid mildew. If using Fits outdoors, once they dry, they should be stored indoors or in the shade to avoid fading. Prolonged exposure to UV rays makes inflatables brittle over time. HOW TO STORE EQUIPMENT- Stack the Fits on end, side by side like books, while maintaining some space between them. This will allow them to dry off between sessions. Stacking them on top of each other doesn’t allow the boards to dry completely. You might notice an odd odor on the deck pad if they are stored this way. Some facilities are limited in terms of storage space and have to deflate and roll them back up. If this is the case, always rinse them with clean water and allow them to dry completely before storing. OTHER EQUIPMENT-
- Waterproof stopwatch
- Fitness/yoga mat (non slip)
- Towels (Mat towel & hand or gym towel)
- Resistance band (Stretch & Tone)
- Medicine ball (HIIT)
WHAT TO WEAR HEAD TO TOE- If participating in an indoor setting wearing a hat is not necessary or recommended. However if taking a CardioWave class in an outdoor pool/setting, wearing a hat is sometimes suggested for sunblock protection. It is suggested the participant wear comfortable clothing that isn’t too loose and know that it may get wet. Loose clothing, denim, sweats etc., once wet, will bog the participant down. Just be aware that not everyone feels comfortable exercising in a swimsuit. Footwear is not necessary as the deck pad is not slick even when wet. If a participant has extenuating circumstances and needs to wear something for support or comfort, water shoes are acceptable.
CHAPTER 4
Lesson 4: Pool Setup
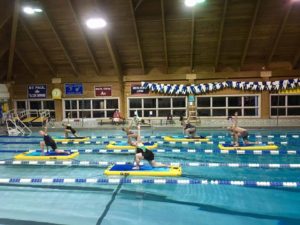
POOL SETUP- There are a number of ways to set up your GlideFit class. Every pool seems to have a unique setup. Some can use lane lines, some can’t. Some pools are rectangular, square, oval, or amoeba-like, therefore every setup can be distinctly different. We have always been able to come up with a rigging system that works regardless. Safety is of the upmost importance- not only for the participants- but for other facility patrons as well that might be utilizing the pool area at the same time. Accordingly, there are things to avoid when setting up boards to maintain a maximum level of safety and limiting liability potential. NEVER rig boards to something outside of the pool onto the pool deck, particularly blocking walkways. Whenever possible rigging equipment should remain in pool. Never use the Fits in less than 4ft of water. In a standard pool with lane lines, the preferred setup is to attach the Fits within a lane, using the closing bungees to attach the corner D rings to the lane line. The Fits should be nose to tail, spaced 2-4 feet apart and 7ft from the pool’s edge as seen below- 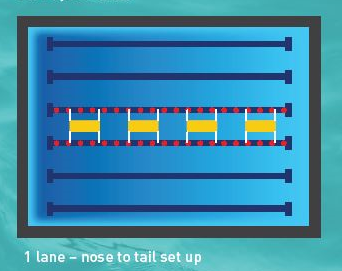 The Fits can also be arranged perpendicular to the pool, side by side. This will usually require the removal of a lane line and then attaching the closing bungees from the D rings to the remaining wider spaced lane lines-
 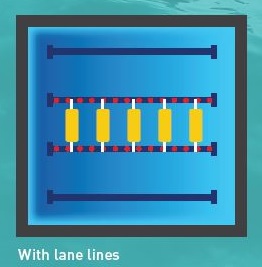 The Fits can also be setup in multiple lanes to accommodate larger classes. Always maintain safe spacing; 2-4 ft. apart and 7 feet from edges-
 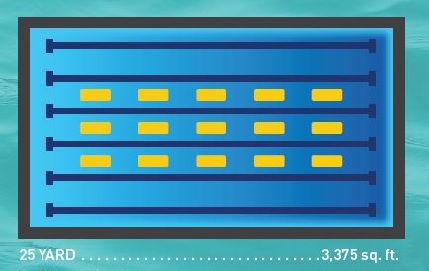 If lane lines aren’t available, you’ll need to arrange your own rigging, finding some way to secure the lines. It’s critical to keep safety first, and you need to consider if other people will be walking around the pool during the class. Rigging lines can be a tripping hazard so plan accordingly. The easiest way to rig without lane lines is using two lines through the D rings and anchoring to single points at each end of the pool, like so-
 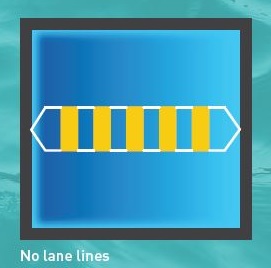 There are numerous ways to arrange Fits, just always make safety your first priority.
CHAPTER 5
Lesson 5: Safety and Personal Conduct
As a CardioWave instructor, your primary goal is the safety and wellness of your class participants. As the instructor it is important that you conduct class in a safe manner and maintain a professional attitude in your decisions and relationships with your clients. 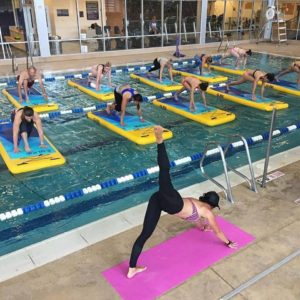 1.Always be guided by the best interests of the class, while acknowledging individuals.
- Keep in mind your primary obligation is to the class as a whole, taking class level and class description into account.
- Strive to provide options and realistic goals for the entire group
- Offer modifications for all levels of fitness and experience (i.e., demonstrate easy and more challenging options)
2.Provide a safe exercise environment.
- Prioritize all movement choices by (1) safety, (2) effectiveness and (3) creativity. Do not allow creativity to compromise safety.
- Use good judgment in class selection. Assess all class moves according to risk versus reward, making sure rewards and benefits always outweigh risks. If you are teaching a Level 3 CardioWave class but your students are struggling with Level 1 moves, do not progress the class beyond the abilities of the students.
- Implement and follow all safety guidelines for applicable venue.
- All students should sign waiver and have swimming ability.
- Keep current on your CPR certification.
- All instructors should know lifesaving rescue techniques for pool environment.
- Nearby access to throwable floatation device (Type 4 PFD).
 3. Fit Setup Guidelines.
- Keep floats in center lanes, do not use side lanes closest to pool edge.
- Instructor should teach from pool edge, not on float or in water.
- Floats should be attached no closer than 7 feet from any edge of the pool.
- Floats should be 2-4 feet away from each other.
- Use closed carabiner bungees to avoid release during practice.
4. CardioWave Guidelines.
- To avoid injury, classes should begin with dynamic warm up and close with static stretching.
- Avoid baggy or cotton clothing, jewelry or accessories which may hinder practice.
- All equipment should be water safe and in good repair.
 5. Stay current on the education and training necessary to lead CardioWave classes.
- Use the CardioWave portal to stay current on the latest research and exercise techniques essential to providing effective and safe classes.
- Maintain CardioWave certification and utilize continuing education opportunities.
- Work within the scope of your knowledge and skill. When necessary, refer participants to professionals with appropriate training and expertise beyond your realm of knowledge.
CHAPTER 6
Lesson 6: CardioWave Levels
 THE PROGRAM- The CardioWave training program is designed to equip instructors with the necessary tools to create a class that is the appropriate skill level for their patrons, making it challenging yet fun in the process. The program has three levels, each building upon the previous.
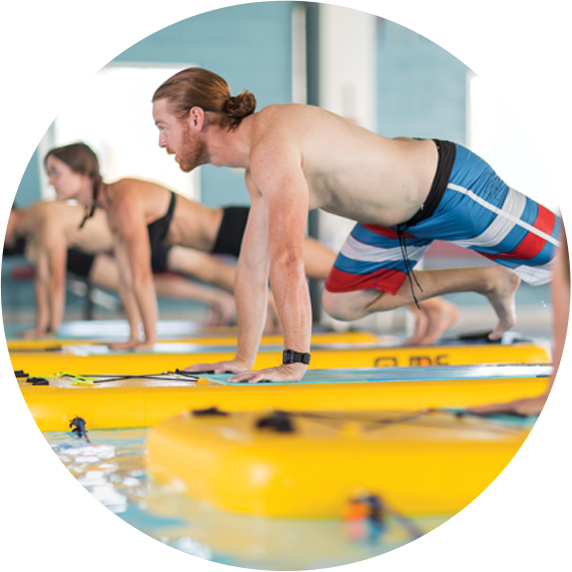
 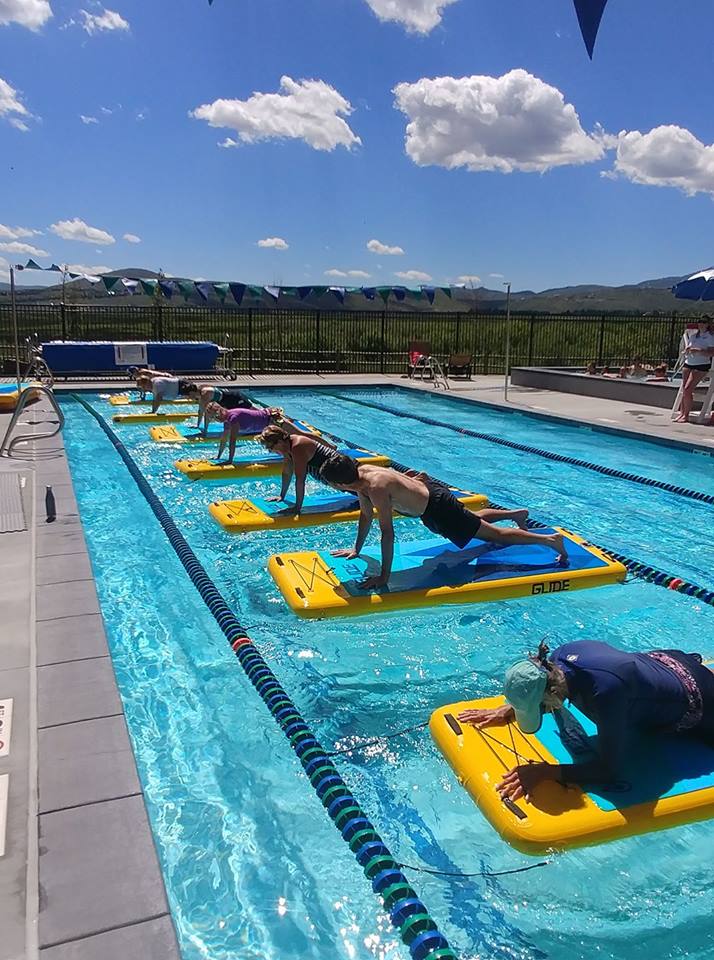 LEVEL I: CARDIOWAVE FOUNDATIONS This class will introduce the fundamentals to working out on an unstable surface in the water utilizing our floating platform. You’ll introduce a variety of exercises to build strength from head to toe while you raise heart rates with the added bonus of firing stabilizers that often go unused. As you orient students on the platform they will be working their cores to strengthen their bodies. Adding in mobility training to keep them moving throughout with different focuses ranging from the hips, shoulders, and knees to test their balance with proper technique.
  LEVEL II: CARDIOWAVE SWEAT & GET WET Prerequisite: CardioWave Level I Building on the basic movement learned in Level I & increasing the difficulty. Level II will introduce single leg movement to increase the challenge to maintaining balance as well as switching up the direction students orient themselves on the platform. You’ll introduce plyometric movement as students jump on the Fit to raise their heart rate. You’ll utilize the platform as a prop to move in and out of the water, getting students wet to cool off while heating up at the same time. Fun agility drills moving around the platform in and out of the water will increase cardio endurance and build strength. Participants will get wet.
  LEVEL III: CARDIOWAVE MAX Prerequisites: (Three Level I classes & at least two Level II classes) The pool party just got amped! Bringing props to your pool workout requiring greater strength, stability, and stamina than the Level I/II classes. Multitasking as you create muscle confusion by tackling balance on the unstable platform, building strength using the bands & accompanying props, along with orienting students in all four directions on the platform. Full body workouts with maximum engagement, and lots of laughter as participants move in and out of the water. Designed to increase strength, cardio-respiratory endurance, balance, and metabolism, the use of various equipment will enhance the work out and increase stability demands on the body. Medicine balls, bands, fins, and a variety of other props will be used to challenge your students. Level III exercises are more complex and typically performed at a faster pace than in Level I/II classes. It is required that students demonstrate greater proficiency in Level I/II in order to advance to this class.
CHAPTER 7
Lesson 7: CardioWave How To’s
 CLASS FORMAT- All CardioWave classes are designed to be taught in a 60 minute format, broken down as follows: • 5 minute equipment explanation, pool entrance/launch • 10 minute warm up phase • 40 minute effort phase • 5 minute cool down including static stretching
  WARM-UP/BREATHING- Each Cardio Wave class starts off with a warm up to carefully prepare the body for exertion. First and foremost we ask the participant to begin by taking a moment to tune into their breath much like one would in a yoga class. There are a variety of breathing techniques an instructor can use to have participants become more mindful of their breath in order to be more efficient for maximum performance. Suggest that the participants allow their minds to control their breath for consistency. Assure them this takes practice and will come in time. Remind them that breath can and will be used to calm the mind during their workout when potential anxiety can kick in and their stability is challenged. Once the breath is addressed, you as the instructor can move onto the physical aspect of the warm up. Dynamic movement can and should be introduced at this time, particularly focusing on warming muscle groups that will be used during the effort phase.
  EFFORT PHASE- Once participants are warmed up sufficiently, you can then proceed to the effort phase which in a typical cardio wave format is much like a HIIT class. Phases of high intensity cardio followed by reps of strength training are the most common. The effort phase can focus on a particular set of muscles or be an all around full body workout.
  COOL DOWN- Slowly bringing the heart rate down is key during the cool down process. It should be accompanied by static stretching. The body is still warm and therefore benefits most from static stretching in this state. Finishing the cool down in a final resting state, commonly referred to in yoga as Savasana, is a key CardioWave element. It’s important to end a class acknowledging the breath and allowing the mind, body, and soul to take a pause.
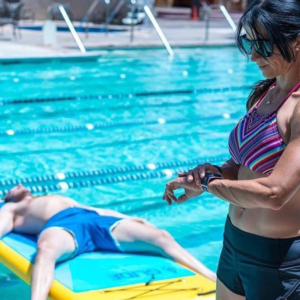
 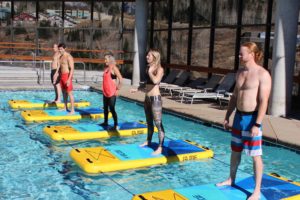 Before class: prior to students getting on the water there are several items an instructor must cover in order to create an enjoyable but safe class. • Always ask participants if there are any injuries or medical conditions you should be aware of. • Talk about the “sweet spot” or center of the board. Provide a frame of reference for maximum stability. • Instruct the participant how to get back on the board when they fall in the water so they are prepared. • Potential for motion sickness is very common. Tell them to feel free to take child pose until they feel like they can begin to move again. • Make the participant aware that their stance will be different on the board to maintain balance but not to sacrifice proper alignment. • General idea as to the structure of the class i.e. warm up, effort, cool down.
  During class: • Proper Stance – keep inviting the participants to change their stance if you notice them struggling. Remind them to link up their center of gravity to the “sweet spot” on the board. • Directional changes – acknowledge the same movement/exercise facing sideways is more difficult than facing forward due to the narrowed surface area or points of contact with board. • Activating the Core properly – 9/10 times if and instructor says activate your core, or engage your core, the participant will suck it in with a big inhale breath, resulting in stopping the natural flow of breath. Ideally using a different visual to activate the core without sacrificing the breath would be to send the breath out of the crown of the head, drawing the crown closer to the sky/ceiling, etc. • Teaching from the deck & the instructor’s eye – It is very important that the instructor teaches from the deck and not from a board. There are several reasons for this: 1. First and foremost it is a safety issue. If you have a participant with either a known or unknown medical condition and they experience an episode of some sort, you could be completely unaware what is happening when time is of the essence. 2. Observing issues with participants’ alignment is easier from the pool deck. Verbal cues don’t always register, so walking to where the participant is, making eye contact, and gently suggesting the correction is far more effective. 3. Voice projection- pools can be extremely noisy environments. Depending on what other programming is going on in the pool at the same time as your class, it is crucial to pace the deck, projecting instructions for everyone to hear. • Reps vs. time – there will be movements/exercises that different participants will be able to do at different paces particularly in a cardio type class. A mix of slow reps. accompanied by timed movement creates a nice environment for the participant to stay on track as well as explore their own pace. This is extremely helpful in classes that tend to vary in skill level. • Intention & Gaze – The gaze can be a powerful tool for the participant. Wherever the gaze focuses, typically the body will follow. Much like skiing, or mountain biking where you look is where you end up. Suggesting to bring the gaze to eye level or above on a fixed point will help when tackling tricky balance positions. Along with the gaze single out groups of muscles to focus on so there is intention behind the movement, i.e. “squeeze that bicep”. • Relax & Ride – learn to read the crowd & motivate appropriately. There is a fine line between pushing to motivate and crossing the line to the point of the participant feeling defeated. Be encouraging, suggesting to the class to be patient with working out on this new unstable surface but at the same time to go for it and challenge themselves.
 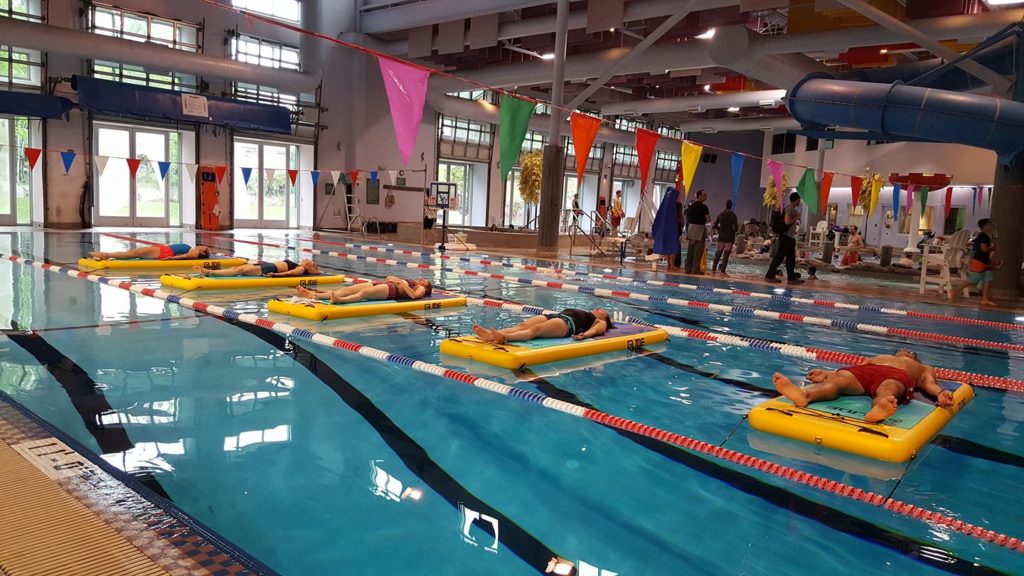 After class: End class with several static stretches to slowly bring the heart rate down and get maximum benefit out of lengthening muscles that have been worked during the effort period. After stretching is complete, invite the participant to lie down on the board in a final resting pose comfortable to them, possibly closing their eyes for a few rounds of breath to close the class in a mindful meditation. TEACHING TIPS- • Talk body and breath. Provide clear anatomy based instruction- avoid cuing with exercise or pose names, especially with beginners. Describe the movement using verbal cues. • Build from the ground up. Work from simple to complex, offering the adapted or modified movement first, and the advanced second. Start classes in foundation poses, seated, laying down, or simple standing. Gradually move to fewer points of contact and more challenging exercises. • Encourage awareness and curiosity. Guide the student to maintain awareness of their bodies and treat themselves with compassion. Pain should not be experienced during exercise. • Observe. Avoid the common pitfall of demoing constantly and practicing the whole class with your students. Instead, watch your students and refine verbal adjustments, incorporating physical demos as needed. You may need to demo more in beginner classes. • Clear the space. Stash water bottles/towels using the bungee tie downs so they do not interfere with movement. • More points of contact means more stability. Be aware of (and cue) points of contact between the body and the GlideFit throughout practice. • Orient students to the center. The center is the balance point for the board. Align the body’s center of gravity with the midpoint and center of the float for optimal stability. • Gaze to fixed point. Cue the gaze often, towards you, the wall, or a fixed point for stability. Avoid sudden gaze changes, as this will cause students to lose balance and fall. • Raised Voice. Remember to use a higher volume with your voice as voice in some pool facilities can become a challenge. If the participant can’t hear you their gaze will change and potentially throw off their balance. • Widen the stance. Forget alignment rules from land. Feet should be at least hip distance apart, widen the stance in lunges, and use the “railroad tracks” cue for feet placement. Create equal pressure with hands and feet, especially in transitioning between exercises and movements. • Demo, then observe. Use clear verbal cuing. Don’t practice the whole time with your class or you won’t be able to see what help they need. • Smile, splash, and have fun! Floating fitness is a joy precisely because it is different from working out on land. Invite students to loosen up, don’t be afraid to get wet, and have a good time.
  WHAT NOT TO TEACH & WHY Though we encourage exploration, there are some exercises/poses, which should not be explored on an unstable surface. This is for safety of the participant’s experience & as you teach, you may add to this list on your own. Cervical spine compressions: tripod headstand, shoulder stand, plow & rabbit. As the board moves unexpectedly, so does the neck. The risks of these poses outweigh the benefits, and we can get the same effects from other poses. HOW TO CREATE YOUR WAVE Creating your class is super easy. You have lots of options. If you have access to the teacher portal it can be as easy as logging on and choosing a pre-made ready to go class with accompanying play list available on the GlideFit Spotify account. You are welcome to create your own with exercises also available on the teacher portal in demo videos. There are no limits to what you can do. An instructor has the freedom to put their own spin on their classes or you can follow the ones in the portal exactly as they are.